While Google Shopping ads have been a mainstay for retailers since 2010, it wasn’t until last year that Bing launched its rival product in the UK.
Announcing the launch, Bing said:
“With 80 per cent of shoppers now researching products online before they decide to buy, managing and organising product ads has never been more important for marketers…”
And though Bing may deliver smaller search volumes when compared to Google, it’s certainly worth exploring Bing Shopping as an addition to any Bing e-commerce account.
The main motives behind doing so are as you would expect; CPCs tend to be cheaper, competition is generally lower and if you have gone through the process of building a product feed for Google then extending your reach across two platforms isn’t difficult.
How to set up Bing Shopping Ads
The process for setting up Bing Shoppping Ads will be a breeze for anyone who has done the same on Google Shopping. If you are starting from scratch, this guide will help you through the process:
Step 1: Ownership
To start with you will need to claim ownership of your site URL within Bing Webmaster Tools. Once you have added your URL you will have three different options of how you want to verify ownership of the site.
Place an XML file on your web server (this is usually the easiest option)
Copy and paste a <meta> tag in your default webpage
Add CNAME record to DNS
Once one of these options is in place, head back into Webmaster Tools and click ‘verify’.
Step 2: Bing Merchant Centre
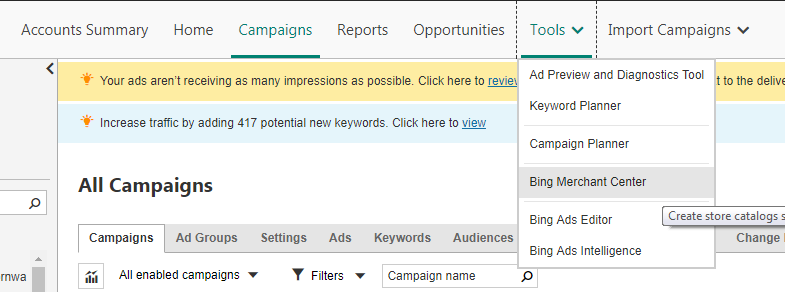
You will then need to create a Bing Merchant Centre for your verified URL. This is where your product feed or 'catalog' will be uploaded. To do this go to the tools tab, find Bing Merchant Center and select 'create store'.

A short form to fill out will appear, covering core site details - name, URL, description, contact details and whether you have a secure checkout. Save the form and your Merchant Centre will now be ready.
Step 3: Product Feed
All that’s left to do now is to upload your product feed to the Merchant Centre. To do this, go to the ‘catalog management’ tab and select ‘create catalog’.

Once again, you’ll be faced with three different options for creating your catalogue:
Automatically download the file from a URL
Upload the file using FTP
Manually upload file
If you are also running Google Shopping using the same upload method for both will likely be the easiest option. Once you have created your catalogue using your chosen method, save it.
Step 4: Approval
Your feed will now enter the Bing approval process, which can take up to two or three days. Check back into the Merchant Centre over that period and you will see your products gradually filter through the approval process.

Should you have any products rejected, you’ll want to rectify these to ensure you can serve 100% of your product catalogue. To do this, download the report associated with your catalogue and fix any issues that have been raised within.
Once all of your products have been approved the groundwork for your Bing Shopping Ads is complete. You are now ready to create your shopping campaigns manually, or import them from your Google Adwords account.